|
In this ‘No Overhead Film Technique’, the entire study is imaged by the
Radiologist if the fluoroscopy room used does not have overhead film capability.
Images are taken by the radiologist to cover the entire colon.
Principles of this technique:
-
The entire colon to be imaged in double contrast
phase.
-
There must be at least a minimum of two images per
segment of the colon.
-
The referring physician, especially
gastroenterologists and GI surgeons, require ‘Overhead survey views” of the
entire colon to get a better perspective of the colonic anatomy and of the
disease segments.
-
Therefore DO NOT ONLY
take magnified views (12, 9 or 6” FOV) views of the colon.
-
Where necessary, give antispasmodics when there is
colonic spasm. (See the Medication section for dosage and contraindications)
This technique consists of four phases:
-
The Rectal Tube Placement Phase
-
The Colon Filling Phase
-
The Colon Insufflation Phase
-
The Imaging Phase
|
The Rectal Tube Placement Phase |
Perform
a limited rectal examination:
- To ensure no rectal lesion
- To facilitate easy and comfortable placement of rectal
tube
- Use 2 % Xylocaine gel
- Gentle hyperventilation and Valsalva maneuver will assist
in quick tube placement
|
|
Inflating the rectal balloon: Using fluoroscopy:
- Inflate balloon gently with supplied air insufflators.
- Maximum inflation should be 80ccs of air (one puff)
- Do not over inflate
|
 Back to Top
|
The Colon Filling Phase with Barium |
|
|
Left Lateral Position:
With the barium bag about 3 feet above the table top, let barium
gently flow into the rectum & sigmoid colon. You can place
patient in slight Trendelenburg position. |
Prone position:
Once the barium has reached the mid-transverse colon, the
patient is turned PRONE. Let the barium bag down on the floor
with the tube open. Ask the patient to ‘bear down’ (i.e. push
the barium out into the bag). This will advance the transverse
colon barium into the right colon, and clear the rectal and
sigmoid of barium. |
Back to Top
|
The Colon Insufflation Phase |
|
|
Right Lateral Position:
The colon is then distended with either air or carbon dioxide
using a CO2 pump. |
Upright Position:
Once barium reaches the ascending colon, bring the patient
UPRIGHT to push barium into the
cecum. |
CO2 Infusion:
Continue infusion throughout these maneuvers until the colon is
well distended. |
Back to Top
|
The Imaging Phase |
|
|
|
Upright Position: |
|
Drain the barium from rectum by opening the barium bag. Re-clamp
the tube and wiith the entire colon well distended in double
contrast take the following views ALL on 9” FOV. |
| Rectum
(Lateral View): Turn the patient in the left lateral
position. Use 9" FOV. |
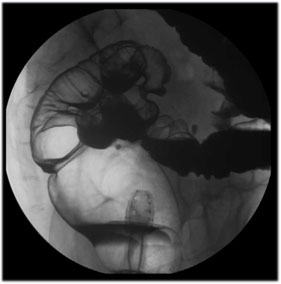 |
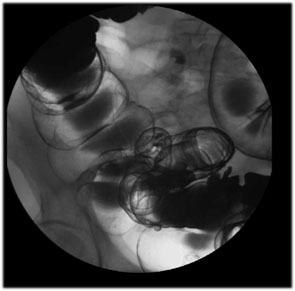
| Splenic
Flexure: Turn the patient to their right for the Right
Posterior Oblique view of the splenic flexure (9" FOV).
|
 |
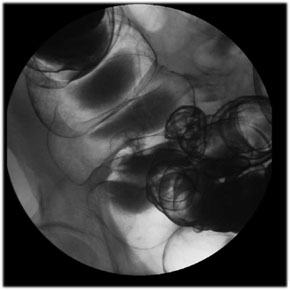
| Hepatic
Flexure: Turn the patient to their left for the Left
Posterior Oblique view of the hepatic flexure (9" FOV). |
 |
|
Supine Position: |
Then bring the table and patient down in supine position and
take the following views. Keep infusing the carbon dioxide if
there is absorption or poor distension. Images are taken on 9” ,
12 and/or 16 “ FOV (as prescribed below).
|
|
|
| Lateral
Rectum: Turn the patient to Left Lateral Decubitus
position and take a lateral view of the rectum with the balloon deflated.
Use 9” FOV. |
 |
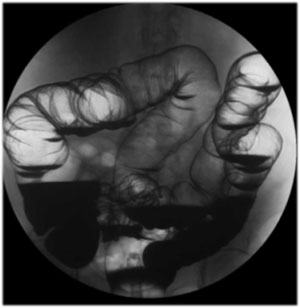
| Left
Posterior Oblique Sigmoid Views: Turn the patient in LPO
position and take multiple views with a straight or angled tube to
get the best view of the sigmoid colon. Use 9” FOV. |
|
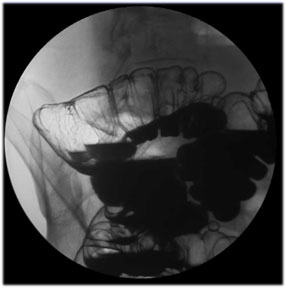
| Supine
Colon Survey View: With the patient in supine position, take a
‘colonic survey’ view using 16” FOV. |
 |
|
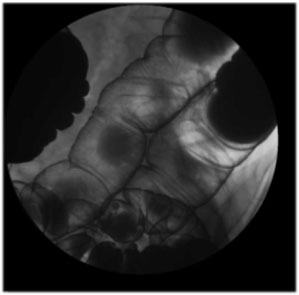
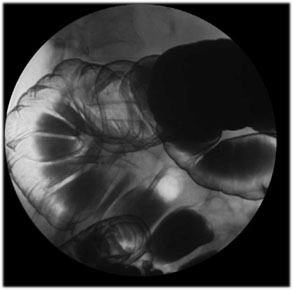
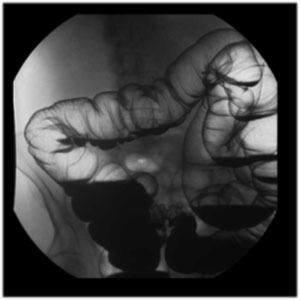
Transverse Colon View: Using 9” FOV take at least 3 views of the
transverse colon. One may have to oblique the patient or angle
the tube to open the transverse colon, especially if it is
redundant. |
 |
|
 |
|
Left Posterior Oblique Position: |
|
Turn the patient in left lateral decubitus position and with a
slight Trendelenburg to let the air rise to the right colon.
Then after a few minutes, turn the patient in LPO and take the
following views of the RIGHT colon. |
|
|
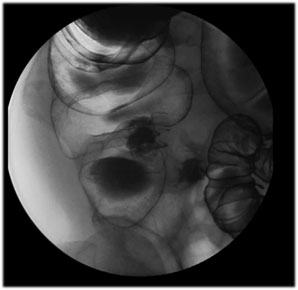
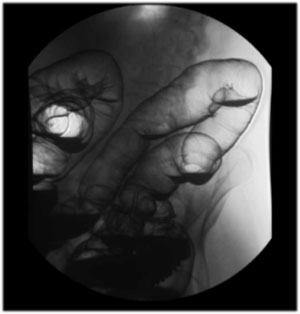
| Right
Colon Survey View: Take an image using 16” FOV to get a
survey view of the right colon. |
 |
| Hepatic
Flexure: Using 9” FOV take views of the hepatic flexure. |
 |
|
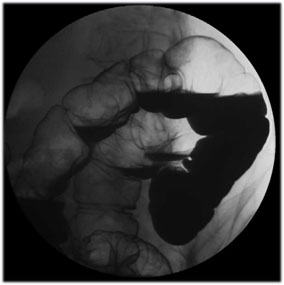
Ascending Colon: Using 9” FOV take views of the ascending
colon. |
 |
| Cecum:
Place the patient supine and take a view of the cecum and
terminal ileum using 9” FOV.
Tips for Cecum Views:
You may have to place the patient prone, right or left
lateral and slight Trendelenburg to drain the barium out of
cecum in order to get double contrast views. |
 |
|
 |
|
Upright Final Images |
|
Bring the patient upright and take the following views using
both 9” and 16” FOV. |
|
|
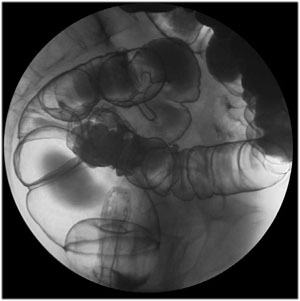
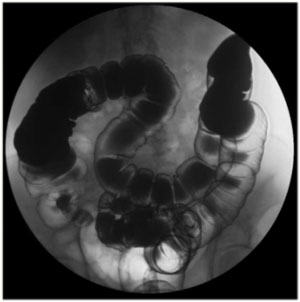
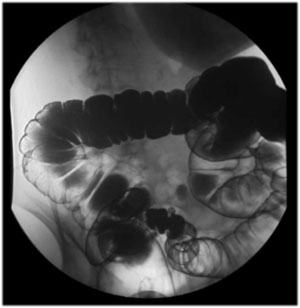
| Colon
Survey View: Using 16” FOV take the following views:
- UPRIGHT view of the entire colon
- LPO view of the RIGHT colon
- RPO view of the LEFT colon |
 |
 |
 |
| Splenic
Flexure: Turn the patient to their right for a Right
Posterior Oblique view of the splenic flexure (9” FOV) . |
|
| Hepatic
Flexure: Turn patient to their left for Left Posterior
Oblique views of the hepatic flexure (9”FOV). |
 |
| Rectum
(Lateral View): Turn the patient in Left Lateral position.
Use 9” FOV. DEFLATE the balloon to
get the entire rectum in double contrast. |
|
Back to Top
|


