Mozilla Thunderbird 1.5.x for Windows 98, ME and XP Installation Guide for use with SSL/TLS
This document is intended for those who want to install Mozilla Thunderbird 1.5.x on a Windows 98, Me or XP system. This software cannot be installed on Windows 95 machines.
Important
Note: If your computer is attached to a local area network (LAN), you should
contact your LAN administrator or technical support person before downloading
and installing this software.
NOTE:
For advanced users who want to quickly configure SSL for their client, CLICK HERE, for SSL
settings
Contents
- Step 1. Download and Install the Software
- Step 2. Initial Test and Configuration of Mozilla Thunderbird
- Step 3. Configuring Mozilla Thunderbird for SSL/TLS
- Step 4. Other Important Email Account Settings
- Step 5. Setting up Newsgroups
- Related Documentation
- How to Get Help
These steps are explained in detail below. Commands are shown in bold type.
Step 1. Download and Install the Software
- Click on the text Click here to start download located on the download Web page (You will need 6 MB for the installer; 52 MB installed).
- Save the file (Thunderbird_Setup_1.5.0.10.exe) to a temporary folder .
- After the download has finished, quit your web browser and disconnect from the UTORdial service.
- Quit any other applications you have running at this time.
- Find the file you downloaded (Thunderbird_Setup_1.5.0.10.exe) and double-click on it. You will see a progress bar as it extracts the files necessary for the installation.
- You will see the Welcome screen. Click Next.
- In the License Agreement screen, read the license agreement carefully, click in the radio button beside "I accept the terms of the License Agreement" and click Next.
- In the Setup Type window, choose "Standard" and click Next.
- Read the Summary to make sure the options you chose are correct and click Next. It will commence installing Mozilla Thunderbird.
- In the next window, make sure the checkbox beside the option to launch Mozilla Thunderbird immediately is deselected and click Finish.
This completes the installation.
Step 2. Initial Test and Configuration of Thunderbird
Connect to UTORdial and start Mozilla Thunderbird by going to Start | Programs and selecting Mozilla Thunderbird.
Setting up E-mail
When you start Thunderbird for the first time, you will be asked if you would like to import settings from another application. Choose the option you would like and click Next.
If you chose to import settings you will see a progress bar. Click Finish when it is complete. Thunderbird will open and ask for your password.
If you chose not to import settings, Thunderbird will open and a New Account Setup window will appear. To set up your UTORmail account, follow these steps:
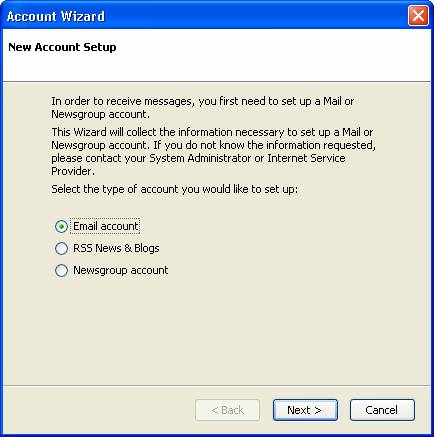
- In the New Account Setup window, choose Email Account. Click Next.
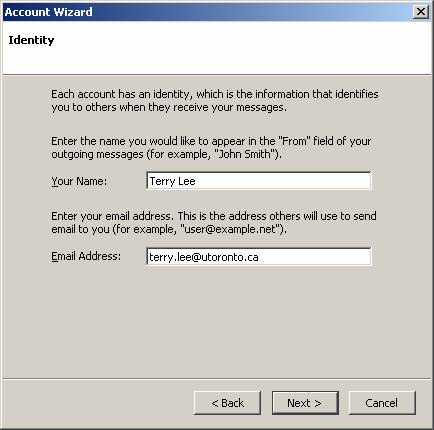
- In the Identity window, type in your name and email address in the appropriate fields as shown below. Click Next.
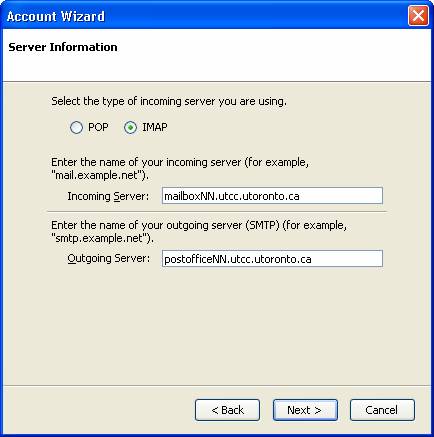
- In the Server Information window, choose IMAP. In the Incoming Server field type mailboxNN.utcc.utoronto.ca (where NN is your configuration number). In the Outgoing Server field, type postofficeNN.utcc.utoronto.ca (where NN is your configuration number). Click Next.
It is very
important that IMAP be selected, since this facilitates access to INBOX
messages, whether on an office, home or other outside PC. This will prevent
messages from being downloaded to your PC by mistake.
NOTE: If you are using an Internet Service Provider other than UTORdial or a
UTORvpn connection, you may have to use that provider's Outgoing mail server
(also referred to as an SMTP server). A number of ISPs require this as a way to
control certain kinds of email abuses. Check with your provider.
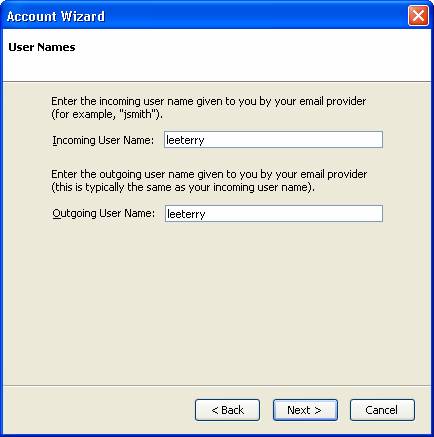
- In the User Names window, type your UTORid in the fields for Incoming User Name. You were assigned a UTORid when you created your mailbox. If you don't remember your UTORid, you can find it by using a web browser and linking to https://www.utorid.utoronto.ca/ and clicking on the link beside Get Information. Once you have your UTORid you can return and configure the mail account properly. Click Next.
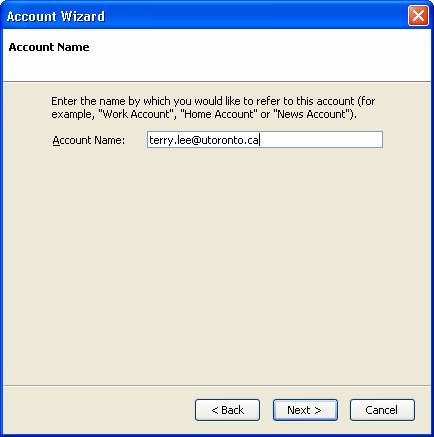
- In the Account Name window, type a name for your account (e.g. UTORmail or your email address). Click Next.
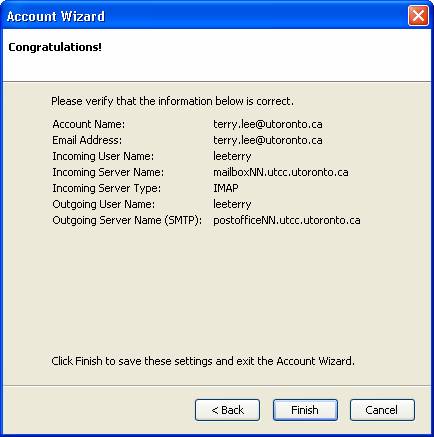
- In the final window, confirm all your settings and click Finish. The program will start and ask you for your password.
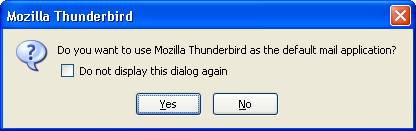
You may be prompted with the dialog box below, asking if you want to make Mozilla Thunderbird your default mail application. Please make the appropriate selection based on your preference. Usually, clicking on Yes will accommodate most circumstances.
In the final
window, confirm all your settings and click Finish. The program will
start and ask for you for your password
Step 3. Configuring Mozilla Thunderbird for SSL/TLS
The following Account Setting preferences are necessary to enable SSL/TLS.
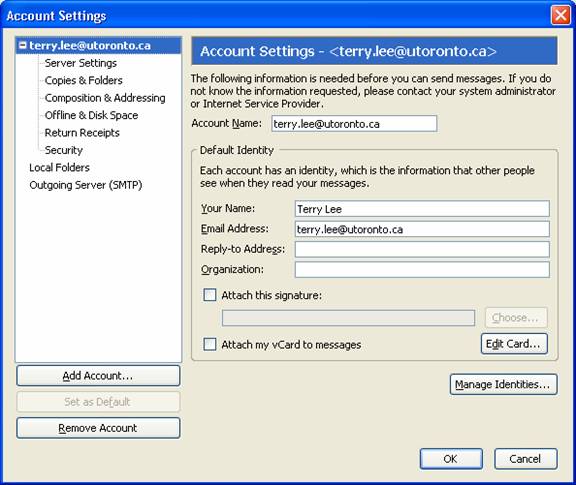
- Choose Account Settings from the Tools menu to review your Account Name and Default Identity information for your UTORmail account along with gaining access to the other Account Settings options.
- Next click on Server Settings for
your UTORmail account to enable SSL/TLS.
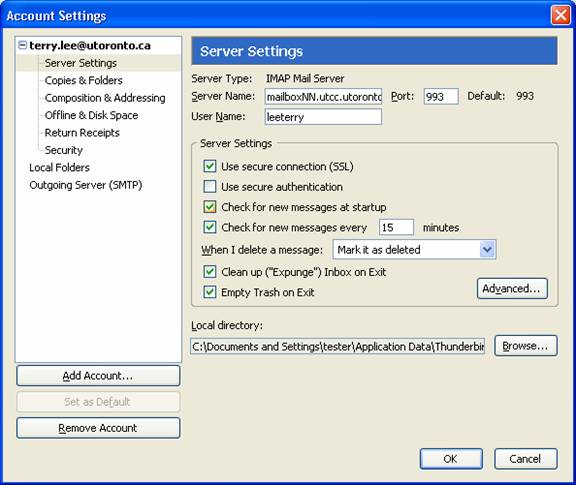
- Looking to the right-hand part of the panel under “Server Settings” make sure there is a checkmark beside Use secure connection (SSL). This will cause the Port number box value to change from 143 to 993.
- Ensure there is a checkmark beside Check for new messages at startup.
- Then make sure there is a checkmark beside Check for new messages every 15 minutes. The preference to check for new messages should be set to 15 minutes or more but not less.*
*(When Thunderbird is used with UTORmail,
you will receive notification of new messages very soon after it is delivered
to your INBOX. This option will not make such notification any faster or
slower. However, when there is a network or post office failure, this option
determines how often Thunderbird will try to reconnect. Setting this option to less
than 15 minutes will cause problems at the post office.)
- In the pull-down menu beside When I delete a message, choose Mark it as deleted.
- Check Clean up (“Expunge”) Inbox on Exit.**
**(This causes your deleted messages to be expunged--so they can no longer be undeleted and no longer take up space at the post office--whenever you exit Thunderbird. We recommend this option to make better use of shared University resources.)
- Check Empty Trash on Exit.
- Next click on the Advanced… button to make the following changes.
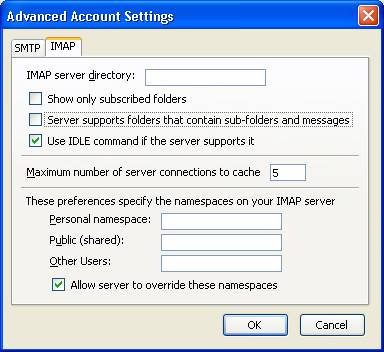
Preferences for Advanced Account Settings
- Click on the IMAP tab if it is not already visible in the foreground.
- Remove the checkmark beside Show only subscribed folders.
- Remove the checkmark beside Server supports folders that contain sub-folders and messages.
- Ensure there is a checkmark beside Use IDLE command if the server supports it.
- The rest of the default settings are adequate
- Click OK
- Click OK again
Step
4. Other Important E-mail Account Settings
Preferences for Local Folders
- Choose Account Settings from the Tools menu and click on Copies & Folders for your UTORmail account.
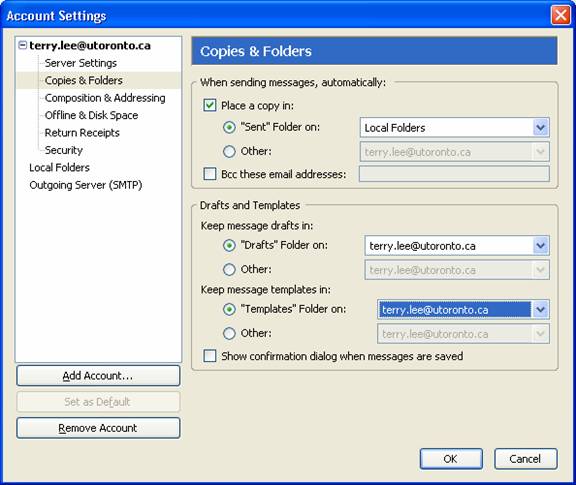
- Under the When sending messages, automatically section, make sure there is a check beside Place a copy in: and in the pull-down menu beside “Sent” Folder on: radio button, choose Local Folders.
- Click OK
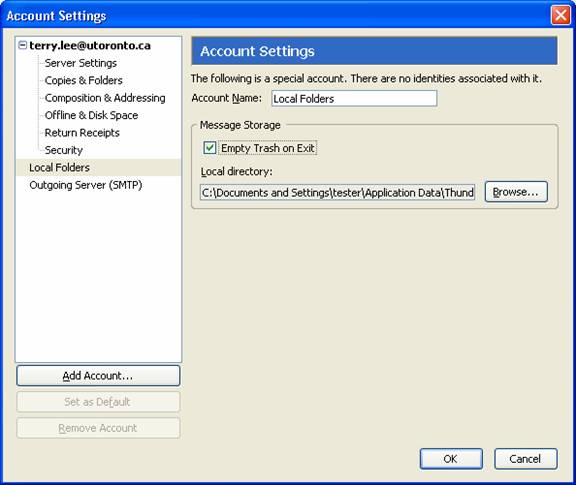
- Next go to the Local Folders Account Settings listing shown below and ensure that the Empty Trash on Exit box is checked.
- Click OK
- As an option, the “Sent” folder can continue to be stored at the post office provided one is willing to regularly clean out old messages and follow the new quota requirements as stated at, http://www.utoronto.ca/cleanup/
Preferences for Outgoing Server (SMTP) Settings
1. Choose Account Settings from the Tools menu and click on Outgoing Server (SMTP) Settings for your UTORmail account
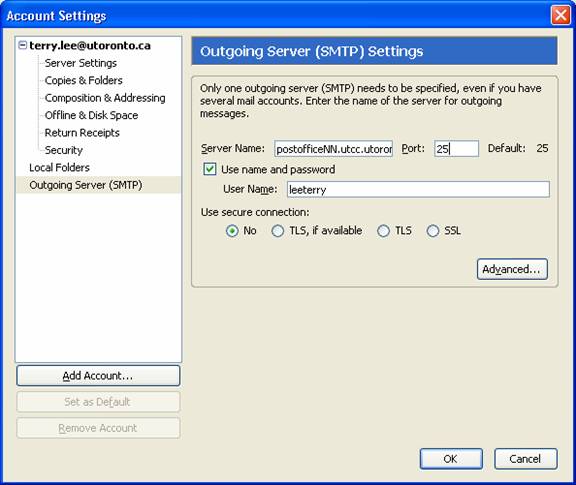
2. Ensure the NO radio button is selected under Use secure connection:.
3. Click OK
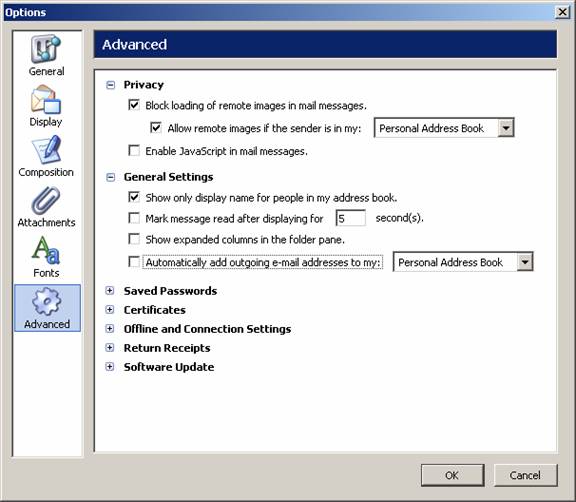
Preferences for Address Books
- Choose Options from the Tools menu and click on Advanced.
- Remove the checkmark beside "Automatically add outgoing e-mail addresses to my: Personal Address Book"
Tip: Review and clean up your address book, getting rid of multiple or invalid entries. Spend a second or two reviewing the To: line before hitting the Send button to ensure your email is correctly addressed.
Preferences for remaining Account Settings listings
Use the default settings for the remaining listings of Composition & Addressing, Offline & Disk Space, Return Receipts and Security.
Related Documentation
Mozilla Thunderbird Fast Forward for Macintosh and Windows describes the basic features of Thunderbird.
UTORdial--Dial-in Internet Services describes the dial-in services available to the general University community.
How to Get Help
If you have questions about installing or using Thunderbird version 1.0, please contact the Information Commons Help Desk at:
- Robarts Library, First Floor,
Phone: 416-978-HELP (416-978-4357)
E-mail: help.desk@utoronto.ca (For faster service, please include your Library number with your question).
Please have your installation instructions with you when you call.
March 28/07