Eclipse Ant basics
Here we cover the basics of Creating, editing, configuring and reusing Ant buildfiles
using Eclipse.
Creating Ant buildfiles
Ant buildfiles are just text files, so the most straightforward
way to create an Ant buildfile in Eclipse is:
- File > New > File.
- Enter any name for the file, but make sure it has a .xml extension.
- Click Finish.
As long as the file has a .xml extension, Eclipse will consider it to be a
possible Ant buildfile, and will enable Ant-related actions when it is selected.
Editing Ant buildfiles
Because Ant buildfiles are simple text files, any text editor
can be used to edit them. But there are several advantages to using the Eclipse
Ant editor, including syntax coloring, content assist and an outline view. To
get familiar with the Eclipse Ant editor, create a simple Ant buildfile using
this editor.
- Create an Ant buildfile called HelloWorld.xml.
- Open the Ant editor on the file by selecting Open With > Ant Editor
from the file's context menu.
Note: To change the default editor for a .xml file to the
Ant Editor, go to Window > Preferences > Workbench >
File Associations. Then click Add to add a new extension, type
*.xml and click OK. Then select it from File Types box,
and in the Associated Editors box click Add. From there select
Ant Editor and click OK.
- Enter the following content in the editor.
<?xml version="1.0" encoding="UTF-8"?><project name="Hello World" default="Hello" basedir=".">
<property name="Hello Text" value="Hello"/>
<target name="Hello">
<echo>${HelloText}</echo>
</target>
</project>
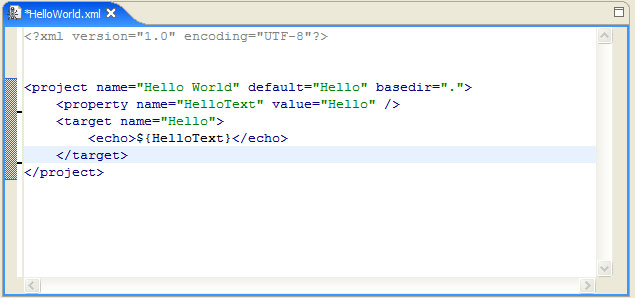
- Notice the syntax coloring for property values.
- Begin to enter a second target by typing '<tar', then hit Ctrl-Space to
activate content assist. A list of valid completions is presented. In this
case there is only one, the <target> tag. Select this completion and notice
that the editor inserts both the opening and closing tags and leaves the
cursor positioned to enter properties for this tag.
- Name this target 'World'.
- Enter a property task called "World Text", with a value of "World",
similar to the "Hello Text" property.
- Enter an 'echo' task for this target similar to that for the Hello
target, but change the text to 'World'.
- Save the changes to HelloWorld.xml.
- Make the Outline view visible (Window > Show View > Outline) and
notice that there are entries for each property and each target. In
addition, each task under a target has an entry.
- Clicking on an entry in the Outline view will scroll the editor to that
entry. In addition, when the Outline view has focus, typing a character will
move the selection in the Outline view to the next visible entry beginning
with that character.
- Position the cursor just past the end of one of the '<target>' tags,
type '<tar', then hit Ctrl-Space to activate content assist. Notice that now
the only valid completion is the 'tar' tag. This is because the Ant editor
knows that nested targets are not allowed. Previously, when the content
assist was used to create a target tag, the editor knew that a tar task was
not allowed outside of a target.
- Close the editor and do not save changes.
Running Ant buildfiles
Any file with a .xml extension can be run as an Ant buildfile.
Of course, not all such files really are Ant buildfiles, but no harm is done if
an attempt is made to mistakenly run a non-Ant .xml file as an Ant buildfile.
In this section, the basic mechanisms for running Ant buildfiles
in Eclipse will be covered, using the HelloWorld.xml file created in the last
section.
- Select HelloWorld.xml in the Navigator and choose Run > External
Tools from its context menu.
- The External Tools dialog appears.
- Click New to create a new Configuration.
- The new dialog that is created allows the configuration of the many aspects of the way an
Ant buildfile is run, but for now concentrate on the Targets tab
which allows the selection of which Ant targets to run and their order.
Select both targets and leave the order as the default.
- Click Run.
- The Ant buildfile is run, and the output is sent to the Console view.
Fortunately, if the buildfile is run so that the Hello target is executed
first and other times so that the World target is first, the dialog does not
need to be brought up each time nor does the ordering need to be changed.
Saving & Reusing Ant options
When we ran the HelloWorld.xml Ant buildfile in the last
section, the choice of targets, along with all other options in the Run Ant
dialog were saved in an entity called a 'launch configuration'. Launch
configurations contain all details necessary to run a single Ant buildfile in a
particular way. It is perfectly valid to have multiple launch configurations
associated with a single Ant buildfile. So, in addition to the launch
configuration that was created in the last step, specifying that our
HelloWorld.xml buildfile should execute the targets Hello & World in that order,
we could create a second launch configuration for this same buildfile specifying
the same targets but in the reverse order. So far so good. But the really nice
thing about launch configurations is that now you can quickly run your Ant
buildfile in either configuration by simply specifying the corresponding launch
configuration.
- From the Workbench toolbar, select Run > External Tools....
- The External Tools dialog opens and presents a choice of launch
configurations to view and edit. The launch configuration we created when we
ran the build.xml buildfile is selected in the tree at the left, and the
tabs on the right show the options for this launch configuration.

- At the top of the dialog, change the Name to 'Hello World' and Apply
the change.
- In the tree at left, right-click on Hello World.xml and choose Duplicate. A copy of the launch
configuration for the Hello World buildfile is created, '(1)' is appended to
the name, and the new launch configuration is selected in the tree.
- Rename the new configuration to 'World Hello.xml'.
- In the Targets tab, click the Order... button, change the
order of the targets so that the World target executes first, and Apply
the change.
- Click Run.
- As before, the HelloWorld.xml buildfile runs and sends its output to the
Console view. This time however, because the targets were reversed, the
output is reversed as well.
- Go back to the External Tools drop down in the toolbar.

Notice now that there are two entries in the history, one for Hello World
and one for World Hello. In order to rerun the Ant buildfile so that it
outputs Hello World, just select this launch configuration in the history.
To rerun the launch configuration that outputs World Hello, select this
configuration in the history.
Note: The history is ordered so that the most frequently
run configurations are at the top of the dropdown.
Using the Ant view
Eclipse provides a standard view, the Ant view, that lets you
work with your Ant buildfiles. This view is tree-structured, showing Ant
buildfiles as top-level entries and targets & internal targets as children. The
main advantage of this view is that you can work with all of your Ant buildfiles
in one place, as opposed to hunting them down in the Navigator.
- Open the Ant view from the workbench menu by selecting Window > Show
View > Ant.
- By default, the Ant view is empty. There are two ways to add Ant
buildfiles to this view:
- Click Add Buildfile
 .
This brings up a dialog in which you explicitly select those Ant
buildfiles you want to add
.
This brings up a dialog in which you explicitly select those Ant
buildfiles you want to add
- Click Add Buildfiles with Search
 .
This brings up a search dialog in which you can specify a filename
pattern for your Ant buildfiles and search within the entire workspace
or a specified working set.
.
This brings up a search dialog in which you can specify a filename
pattern for your Ant buildfiles and search within the entire workspace
or a specified working set.
Once added to the Ant view, Ant buildfile entries remain in the view
across workbench invocations until explicitly removed.
- Click Add Buildfiles with Search. Suppose you only
remember that the buildfile you want to work with starts with 'H'. Enter
'H*.xml' for the buildfile name. Make sure Workspace is selected for the
scope, then click Search. The HelloWorld.xml file is found and placed in the
Ant view.
- Expand the top-level entry to see the default target Hello, and the
internal target World.
- Select the World internal target and click Run the Default
Target of the Selected Buildfile
 .
Choose your configuration from the Ant Configuration Selection box (if you
chose to create a second configuration above) and click OK. Notice that just the World target gets executed.
.
Choose your configuration from the Ant Configuration Selection box (if you
chose to create a second configuration above) and click OK. Notice that just the World target gets executed.
- Select the top-level HelloWorld buildfile and click Run the
Default Target of the Selected Buildfile. Notice that just the
default target, Hello, gets executed.
- To edit your buildfile, right-click on the HelloWorld file
and select Open With > Ant Editor.
Note: The choice and order of targets is ignored when running from
the Ant view.
For a full list of the Ant Tasks see the Ant Manual.