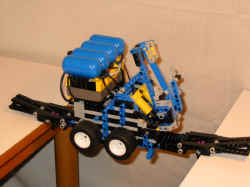
This robot was built for Brickfest 2002. At this convention several robotics competitions were held. This one involved building a robot that could cross a 12 inch gap between two tables, rotate its entire structure 360 degrees on the other table, then cross back onto the starting table. First off, let me say that I can't stress enough the importance of reading the rules carefully. I skimmed over the rules quickly, and wrongly assumed that the robot had to be 12 inches tall or less. This made the task extremely difficult, since the robot had to build an expanding bridge, then be able to pick it up once it had crossed, and be small enough to rotate within the 18 inch wide landing area. The real trick to this contest was to build a very tall, narrow robot, so the bridge is in one piece. Doug Carlson built an extremely smooth robot like this, and easily won first prize. I came in third place (out of three :)
The Robot |
|
|
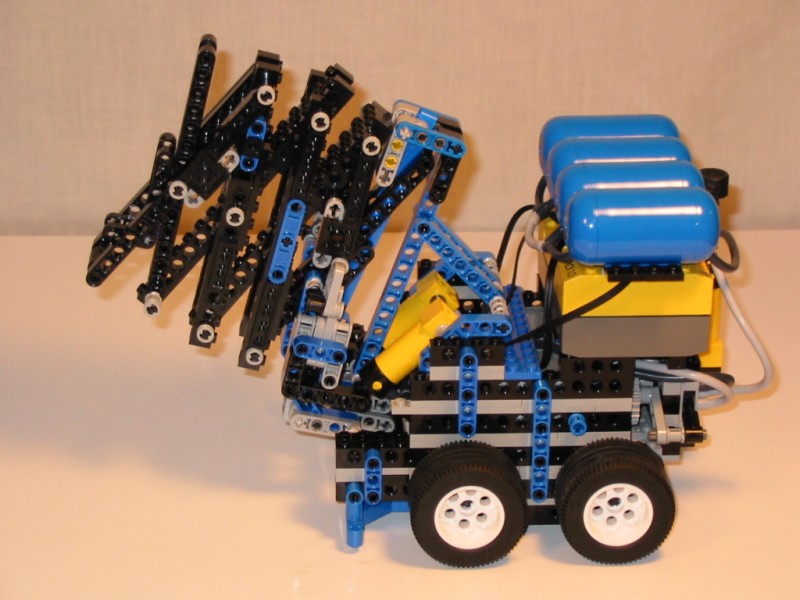
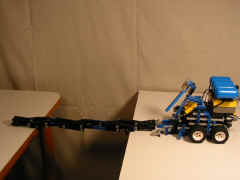
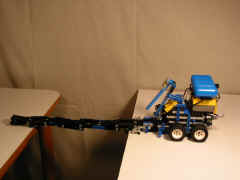
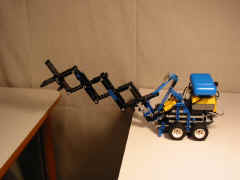
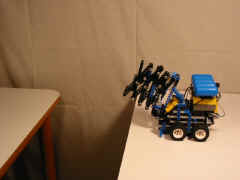
Here is the robot with the bridge loaded and ready to go. The pneumatic cylinders raise and lower two forks that allow the bridge to be deployed or picked up. |
|
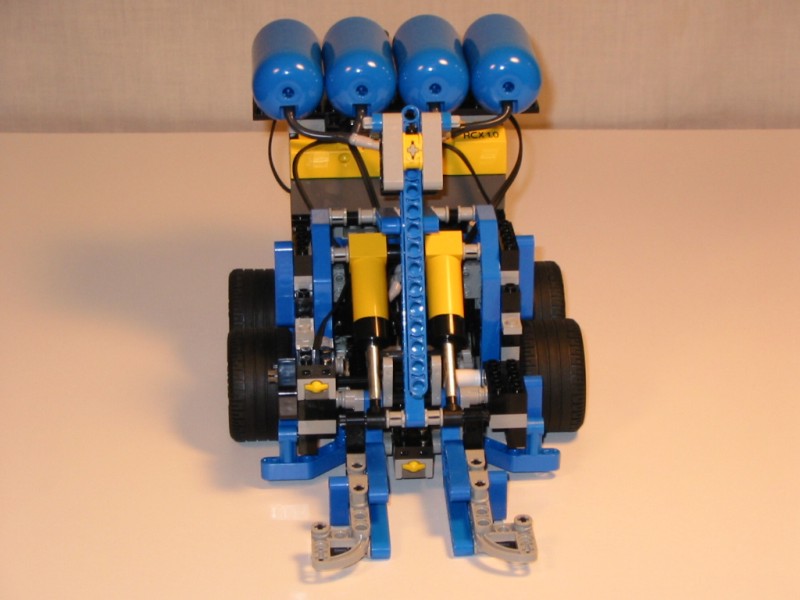
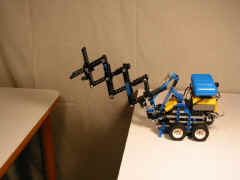
At the front you can see the pneumatics and the forks more clearly. There was originally two touch sensors to detect the table edges. The robot would drive forward until it detected the edge, back up a little, and then deploy the bridge. The pneumatics were quite powerful, so maybe a better way of describing it is 'launched' the bridge. |
|
|
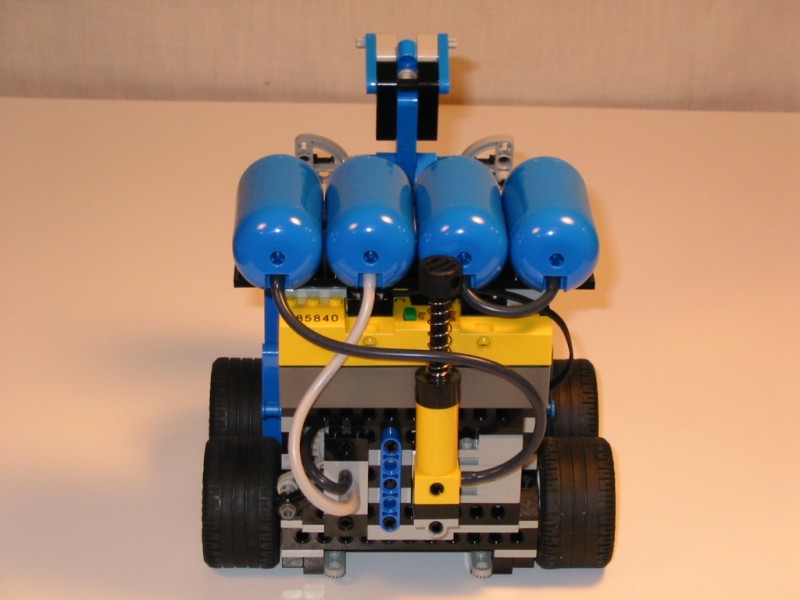
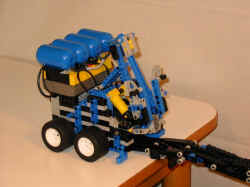
The rear end of the robot. The tanks were pumped up manually before running the robot. It was tough to determine just how much pumping was required. Too little and the robot would run out of air. Too much and the pressure would be too high, causing the bridge to launch across the table. |
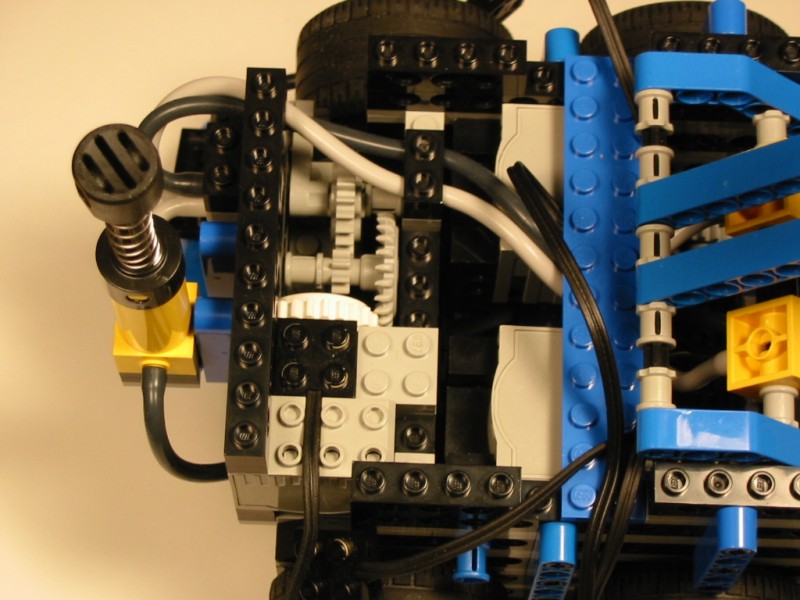 |
With the RCX and air tanks off you can see the gearing to drive the pneumatic valve. The white clutch gear allows some slip when the end of the stroke is reached. I had to put it in the beginning of the gear train because the friction in the clutch was not enough to move the valve on is own. |
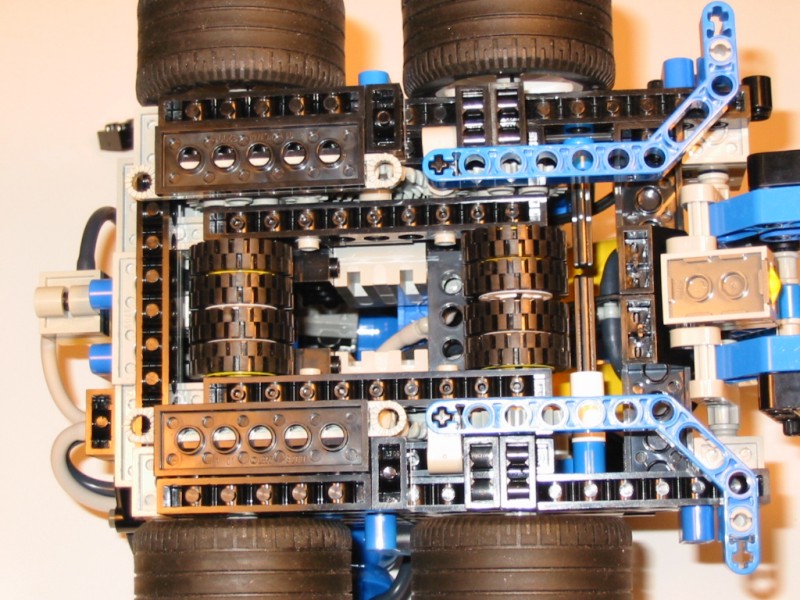 |
The bottom side of the robot. The touch sensor in front was used to detect the bridge when picking it up. The blue angle beams acted as guides to keep the robot on the bridge. The robot straddled the bridge when crossing, the idea being that the guides would keep it driving straight. The small wheels in the center drove the robot across the bridge. They were driven at the same speed as the large wheels, so the robot would fight a bit when getting on and off the bridge. This is because the two different sized wheels wanted to move the robot at different speeds. |
Pickup Sequence |
|
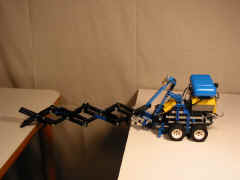
| To pick up the bridge, the robot lowers its forks, then drive forward until the touch sensor in the front detects the bridge is in place. Then the forks are lifted. The blue beam above the forks catches a pin on the bridge and forces it to collapse as it is lifted. Deploying the bridge is the same, only in reverse. | |
|
|
Crossing Sequence |
|
| Once the bridge is deployed, the robot backs up and then raises its forks. Then it drives straight over the bridge, riding on the small wheels underneath. Since the bridge was so narrow, and the robot was quite heavy, it was unstable and fell a lot! | |


|
|