This was my first real Lego Mindstorms project. I got my RIS 1.5 for Christmas in 1999. After toying with some of the (lame) robots in the constructopedia, I decided to tackle the photocopier I saw on the back of the box. It took almost all of my Lego that I had at the time. The only big challenge was balancing the pen lifter so that the pen would return to the same point each time it moved up and down. The proper way of doing this is with sensors, but I only had three sensors at the time. I experimented with many combinations of elastics, and eventually got it to work. Sorry the pictures are so awful, I had to borrow a digital camera from my dads school, which really sucked (a whopping 320x240 resolution!).
|
|
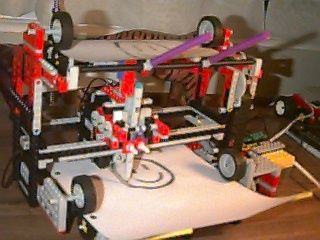
Front view. The paper loads in the bottom, and the page to be copied loads above. |
|
|
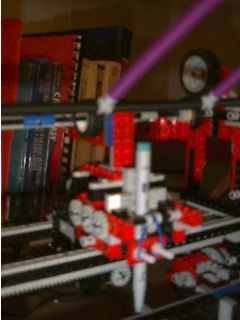
Really crappy close up of the print head. I used nylon screws to hold the pen firmly. |
|
|
During operation. As the print head moved back and forth, it scanned the top page with the light sensor. When a dark line was detected, the pen would lower onto the bottom page until blank paper was detected again. Both top and bottom pages were advanced slightly after each pass. |
|
|
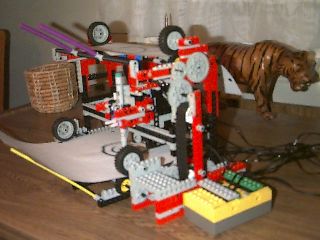
Side view showing some of the paper feed gearing. |
|
|
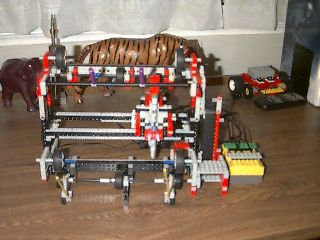
Angle view. Don't you like the tiger in the background? |

|
This is a picture of the test page I used in the photocopier. |

|
Here is an example of the resolution I was able to get. Notice the copy is a mirror image of the master. This was because the print head scans underneath the master, and prints on top of the copy. |
Some time in the future I would like to build a new and improved version of the photocopier. I think the resolution could be greatly improved.