
First, the source of inspiration. I know most of you who are
looking at this page have seen 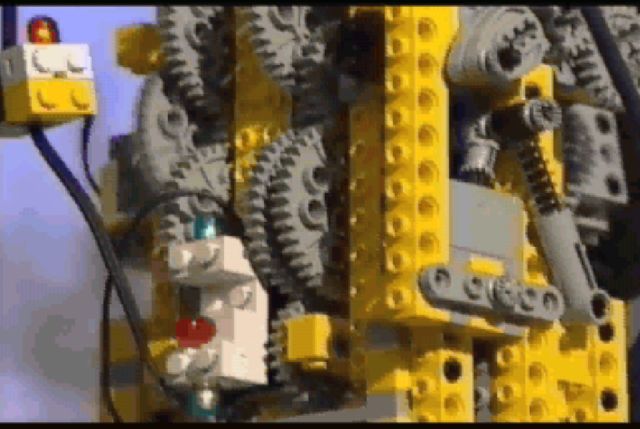 the
the
 introduction
video on the Lego Mindstorms CD. In this video, we get a couple glimpses of one
very cool looking robot that is climbing up a window! Boy was I inspired! It
took me quite a while to figure out how to do this... It was actually a school
project that led me to the discovery of creating a vacuum pump with Lego. I
first experimented with some check valves and suction cups from an aquarium
store. With the check valves connected to a Lego pneumatic cylinder, I could
create a piston pump. Then I realized that Lego actually made a block with check
valves in it for the old pneumatic system, which was all single acting. (meaning
the cylinders have only one inlet. To push the piston up, air was pumped into
the cylinder. To pull the piston down, air was sucked out) I had one of these
old pneumatic sets when I was younger, but the key parts had been misplaced :(
Fortunately I was able to borrow them from Calum
Tsang. And so, the workings of
the window walker were born. I just had to figure out the walking mechanism and
the timing....
introduction
video on the Lego Mindstorms CD. In this video, we get a couple glimpses of one
very cool looking robot that is climbing up a window! Boy was I inspired! It
took me quite a while to figure out how to do this... It was actually a school
project that led me to the discovery of creating a vacuum pump with Lego. I
first experimented with some check valves and suction cups from an aquarium
store. With the check valves connected to a Lego pneumatic cylinder, I could
create a piston pump. Then I realized that Lego actually made a block with check
valves in it for the old pneumatic system, which was all single acting. (meaning
the cylinders have only one inlet. To push the piston up, air was pumped into
the cylinder. To pull the piston down, air was sucked out) I had one of these
old pneumatic sets when I was younger, but the key parts had been misplaced :(
Fortunately I was able to borrow them from Calum
Tsang. And so, the workings of
the window walker were born. I just had to figure out the walking mechanism and
the timing....
|
|
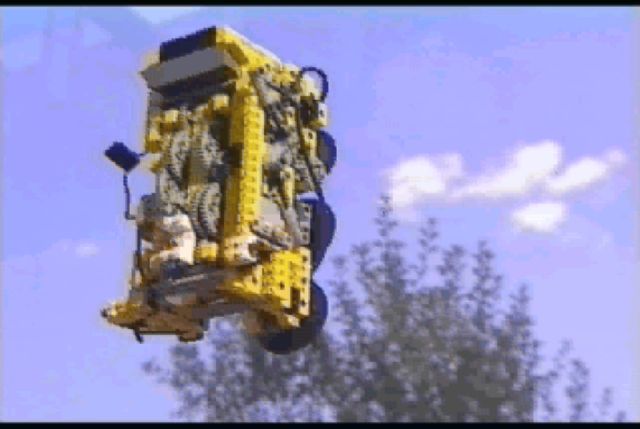
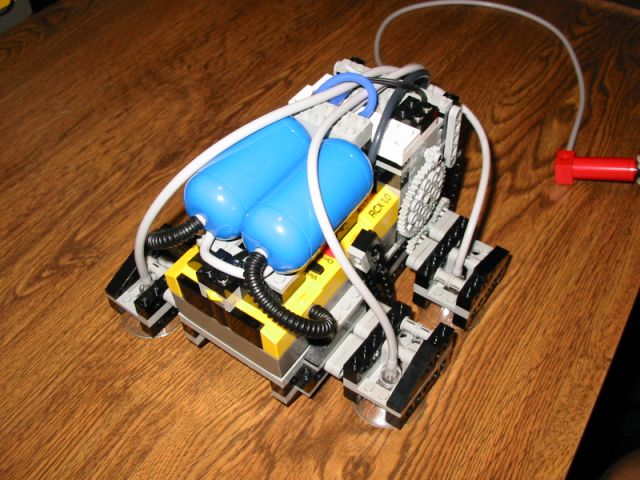
My window walker climbing away. Its pretty slow, since it takes a lot of power to lift its own weight. I used 15:1 gearing. |
|
|
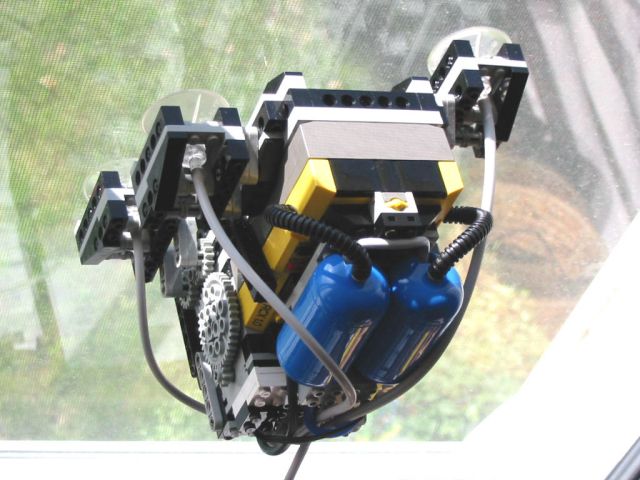
Back view while climbing. The tail that you see is spring loaded to help offset the robots weight and allow it to suck onto the window reliably. |
|
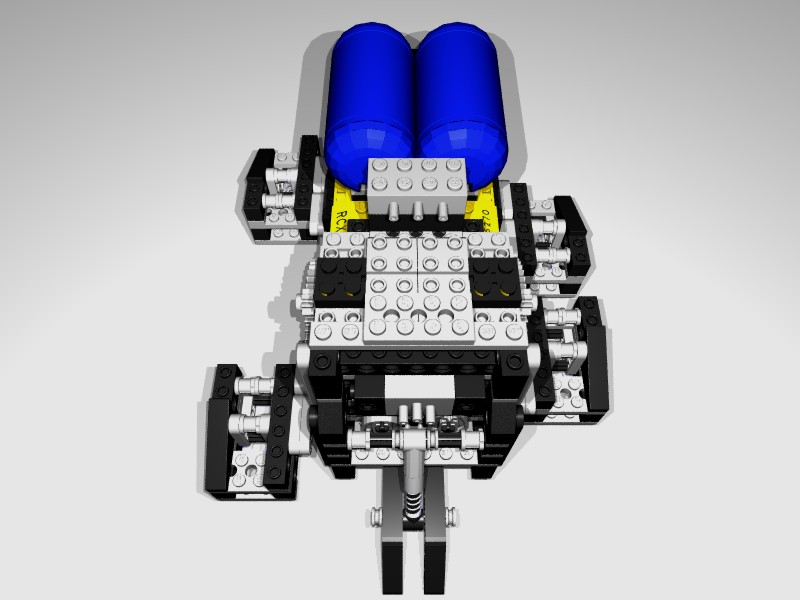
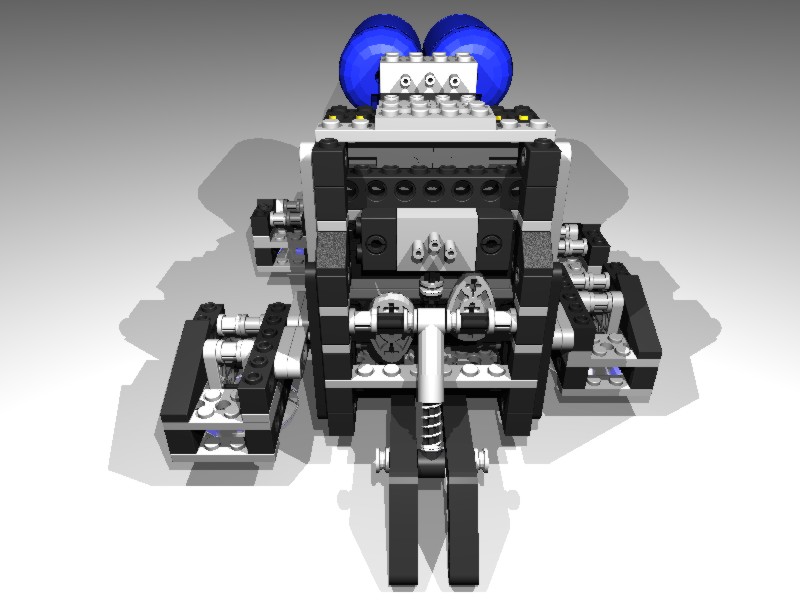
Top view of the virtual model. |
|
|
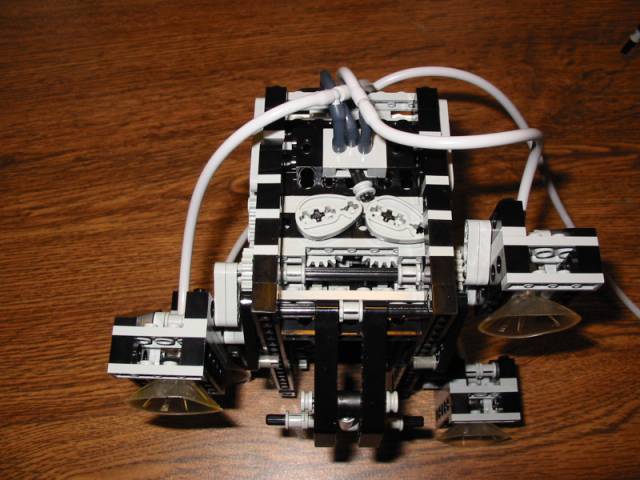
Top view of the real robot while climbing (notice the many marks on the window from previous climbs :) |
|
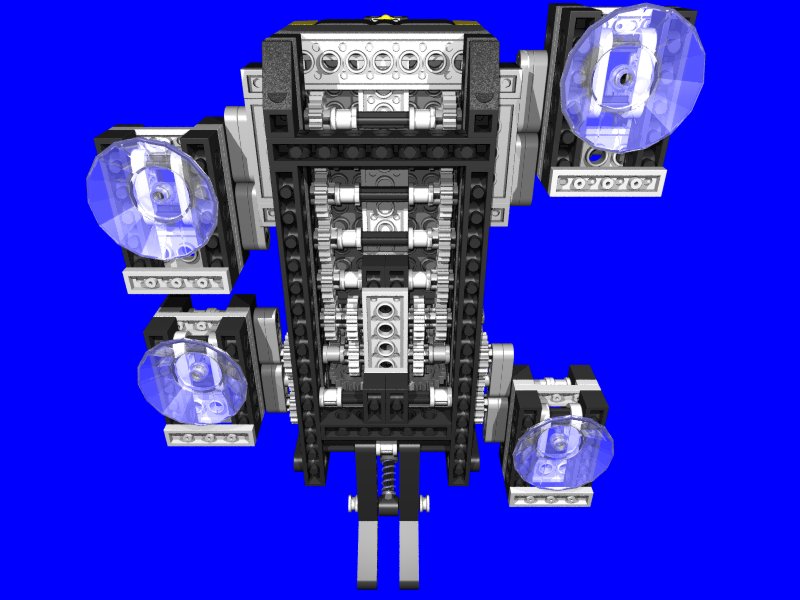
Bottom view of the ldraw model. You can see it uses a whole lot of 16 tooth gears. |
|
|
At rest. Now you can see my secret. The red cylinder in the background is an old style pneumatic cylinder. This, coupled with the old pneumatic valve block allows me to create suction. The robot is charged up before and during climbing by sucking the air out of the blue tanks to store a vacuum. This vacuum is connected to the suction cup feet at just the right time by means of a valve... |
|
|
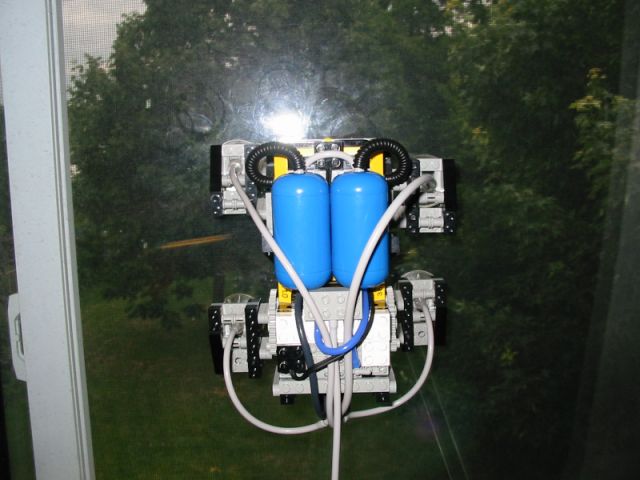
Rear end view, showing the plumbing for the suction lines. |
|
Rear view rendering. You can see the valve block piece on top. |
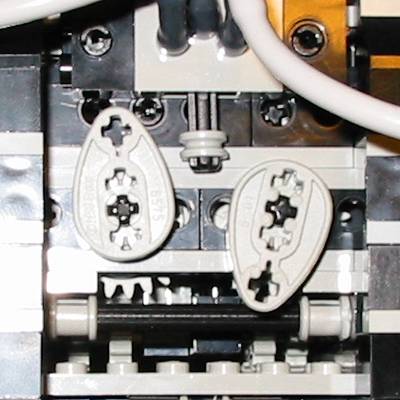
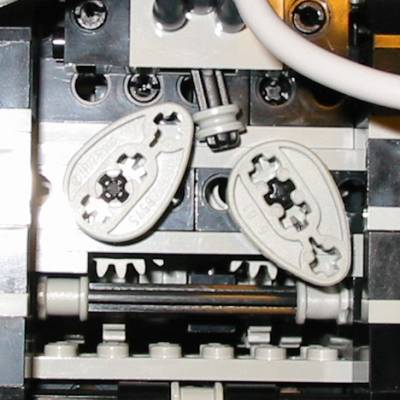
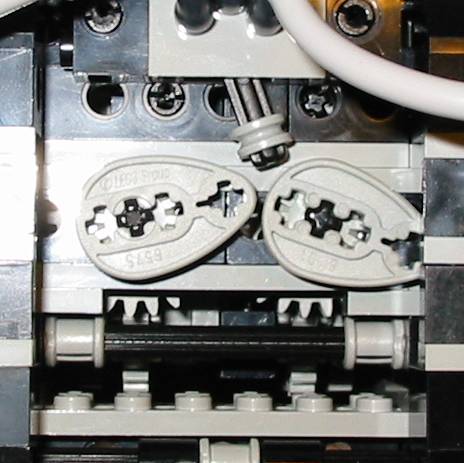
This sequence shows how I used two counter-rotating cams to flip the
pneumatic valve back and forth. This is geared directly to the drive train, so
the timing of the switching is critical. Just as two feet come up to the glass,
the other two have to be released, without falling off. Getting this to work was
tricky, but once I got it, it was pretty reliable.
The suction mechanism is a bit tough to explain without a diagram, so I have put an explanation on a separate page.
I really would like to have motor drive the vacuum pump onboard. I have made several attempts, but none were satisfactory. It seemed that once the motor was geared down enough to power the pump, it was too slow to maintain the necessary vacuum in the tanks.
I just recently put together the window walker in ldraw, so if you have the special parts required, and would like to have a go at building one, you can download the instructions here. You will probably need the pneumatic parts for ldraw, so you can download them here. Just copy them into your ldraw parts directory.
